Metal学习笔记02 渲染图片纹理

上篇笔记

上篇笔记实现了用Metal绘制三角形和矩形,这次来绘制一张图片。

加载图片为纹理

加载图片为纹理有两种方式,一种是使用MTLTextureDescriptor创建Texture,需要将图片转为位图的buffer,另一种是使用MetalKit中的MTKTextureLoader,这种方式使用CGImage即可。

使用MTLTextureDescriptor创建Texture

1
2
3
4
5
6
7
8
9
10
11
12
13
14
15
16
17
18
19
20
21
22
23
24
25

	@property(nonatomic,strong)id<MTLTexture>texture;
	...
	NSString*imagePath = [[NSBundle mainBundle]pathForResource:@"container" ofType:@"png"];
    UIImage*image = [UIImage imageWithContentsOfFile:imagePath];
    CGImageRef cgImageRef = [image CGImage];
    GLuint width = (GLuint)CGImageGetWidth(cgImageRef);
    GLuint height = (GLuint)CGImageGetHeight(cgImageRef);
    CGRect rect = CGRectMake(0, 0, width, height);
    void *imageData = malloc(width * height * 4);
    CGContextRef context = CGBitmapContextCreate(imageData, width, height, 8, width * 4, CGColorSpaceCreateDeviceRGB(), kCGImageAlphaPremultipliedLast);
    CGContextTranslateCTM(context, 0, height);
    CGContextScaleCTM(context, 1.0, -1.0);
    
    CGContextDrawImage(context, rect, cgImageRef);
    CGContextRelease(context);
	
	...
	
	
	MTLTextureDescriptor*textureDes = [MTLTextureDescriptor texture2DDescriptorWithPixelFormat:MTLPixelFormatRGBA8Unorm width:width height:height mipmapped:NO];
    self.texture = [self.device newTextureWithDescriptor:textureDes];
	
	MTLRegion region = MTLRegionMake2D(0, 0, width, height);
    [self.texture replaceRegion:region mipmapLevel:0 withBytes:imageData bytesPerRow:width*4];

这里将UIImage转为imageData,然后创建一个纹理描述器,设置宽高、颜色格式。然后device根据描述器创建一个纹理。之后调用replaceRegion:方法将图片数据放入纹理中,其中region参数表示图片的范围。需要注意的是,由于CGImage的坐标中y轴是向上增长的,和UIKit相反,所以CGContextDrawImage的图片会上下颠倒,需要做下翻转。具体可以参考 ios-绘图之图片上下颠倒

使用MTKTextureLoader创建Texture

1
2
3
4
5
    MTKTextureLoader*loader = [[MTKTextureLoader alloc]initWithDevice:self.device];

    NSError*error;
    self.texture = [loader newTextureWithCGImage:image.CGImage options:@{MTKTextureLoaderOptionSRGB:@(NO)} error:&error];

这里使用device创建一个MTKTextureLoader,然后传入图片的CGImage即可。

设置texture为renderEncoder的纹理

1
	[renderEncoder setFragmentTexture:self.texture atIndex:0];

修改shader

1
2
3
4
5
6
7
8
9
10
11
12
13
14
15
16
17
struct VertexOut
{
    float4 position [[position]];
    float2 textureCoordinate;
};
vertex VertexOut texture_vertex (
    constant float4*vertex_array[[buffer(0)]],
    constant float2*textureCoord_array[[buffer(1)]],
    unsigned int vid[[vertex_id]]){

    VertexOut outputVertices;

    outputVertices.position = vertex_array[vid];
    outputVertices.textureCoordinate = textureCoord_array[vid];

    return outputVertices;
}

因为渲染纹理需要顶点着色器向片段着色器传顶点坐标和纹理坐标,所以这里定义了一个结构体,用作顶点着色器函数的返回值类型。函数第一个参数表示传入的顶点数据数组,第二参数表示传入的纹理坐标数组。函数的实现就是将顶点和纹理坐标组合成结构体返回。

1
2
3
4
5
6
7
fragment float4 texture_fragment(VertexOut fragmentInput [[stage_in]],
                                 texture2d<float> inputTexture [[texture(0)]]) {
    constexpr sampler quadSampler;
    float4 color = inputTexture.sample(quadSampler, fragmentInput.textureCoordinate);

    return color;
}

这里第一个参数是从顶点着色器返回的,包含顶点和纹理坐标,第二个参数是传入的纹理。函数实现中,定义了一个取样器,用于取得纹理对应坐标的颜色并返回。

创建纹理坐标buffer并传入renderEncoder

1
2
3
4
5
6
7
8
9
	float textureCoord[] = {
        0,0,
        1,0,
        0,1,
        1,1
    };
    id<MTLBuffer>textureCoordBuffer = [self.device newBufferWithBytes:textureCoord length:sizeof(textureCoord) options:MTLResourceCPUCacheModeDefaultCache];
    
    [renderEncoder setVertexBuffer:textureCoordBuffer offset:0 atIndex:1];

这里创建了一个MTLBuffer,并作为序号1的参数传给着色器,对应顶点着色器函数中的textureCoord_array.

之后运行即可看到图片纹理。
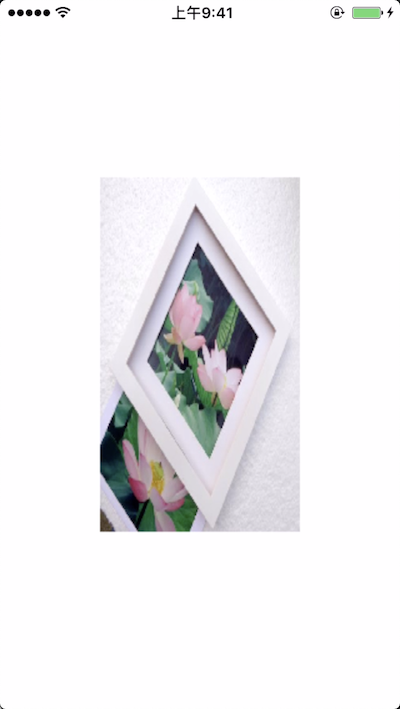

Metal03

总结

在使用MTKTextureLoader时发现它属于MetalKit,和Metal不在同一个framework,MetalKit是为了更方便开发者使用而推出的,并且更加便于和iOS原生的数据交互,例如MTKTextureLoader就可以直接使用CGImage生成纹理,很方便。另外就是Metal的shader语言更加灵活,可以自定义结构体,可以更加灵活的传递各种参数。

demo地址